 LUNAR’clips
LUNAR’clips
Livermore Unit of the National Association of Rocketry May/June 2002
Copyright © 2002 by LUNAR, All rights reserved.
David Flournoy, LUNAR # 568
Public Missiles has another winner with the Little Lunar Express. This is a cool "retro" rocket, styled like your favorite 50's sci-fi movie rocket. This rocket uses piston ejection with a large 44" parachute stuffed into an airframe that is a comfortable 37" tall and 4" in diameter. The 4 fins are not identical, there are two "wings" and two "stabilizers" complete with pods. The kit also includes a pre slotted tail cone, two pre cut launch lugs and decals to complete the look.
The kit is up to PML's normal high quality. The instructions are clear and well illustrated. You can see most of the components in Picture #1; I had already attached the piston strap and installed the motor tube into the parachute deployment tube. The kit uses two centering rings to attach the motor mount to the piston tube.

Picture #1
The kit suggests using friction fit for motor retention. I did not feel comfortable with this, so I devised a motor clip system that would work with the tail cone and survive a less than perfect landing (i.e. that one rock on the launch field that you always seem to land on). Picture #2 shows the inside of the tail cone where I epoxied two T-nuts in two strips of 1/4" basswood (approx. 3/4 " by 4"). I located the clips on the underside of the rocket so that they would match the rest of the rockets' styling. I used #8 T-nuts and screws, which are probably over kill, #6 T-nuts and screws should work just as well. The clips them selves were made of aluminum by Martinek Manufacturing [www.martinek.com], the prototypes were polished and look great with the silver paint I chose. You can contact Martinek Manufacturing for an express motor clip kit part number is 321-0001-01 ($10 plus postage) at mark@martinek.com or call Mark at 510-438-0357.
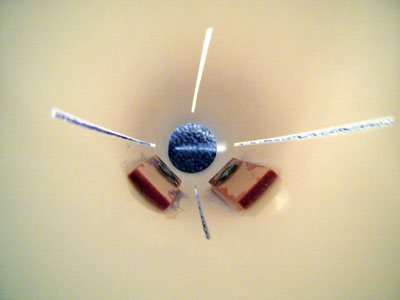
Picture #2
The fins are G-10 and are attached through the wall to the motor mount. Due to the very tight fit PML suggests "pouring" epoxy down the tail cone to secure the fins, since there is very little control over where the epoxy will flow I used the setup in picture #3. Standard drinking straws are just long enough that they will allow you to "inject" the epoxy right at the fin joints. I was worried about how well the wing pods would stand up to a hard landing so I drilled two 3/32" holes at the very tip of each wing where the pods attach to act as epoxy rivets.
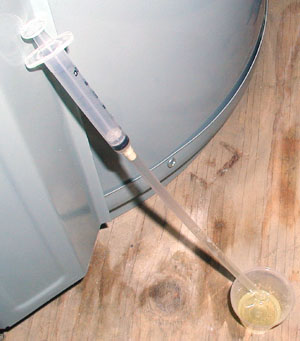
Picture #3
The rest of the assembly went per the instructions except I used 6 oz of fishing weights epoxied into the nose cone instead of modeling clay. One thing to be careful about, is with your fin filets and the tail cone, I made mine using thickened epoxy and shaped them with a tongue depressor. When I do this there is normally some smearing that occurs which on a phenolic tube I just sand until smooth. With the plastic tail cone, however, the vigorous sanding started to fuzz up the plastic and it took a lot filling to get it close to smooth again.
Picture #4 shows the completed model with the recovery system, yes it does fit, but just barely. Picture #5 shows the fully assembled model next to a yardstick for size comparison. Picture #6 shows the motor retention clips installed.
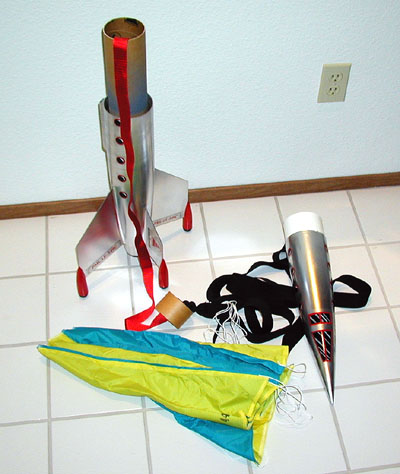
Picture #4
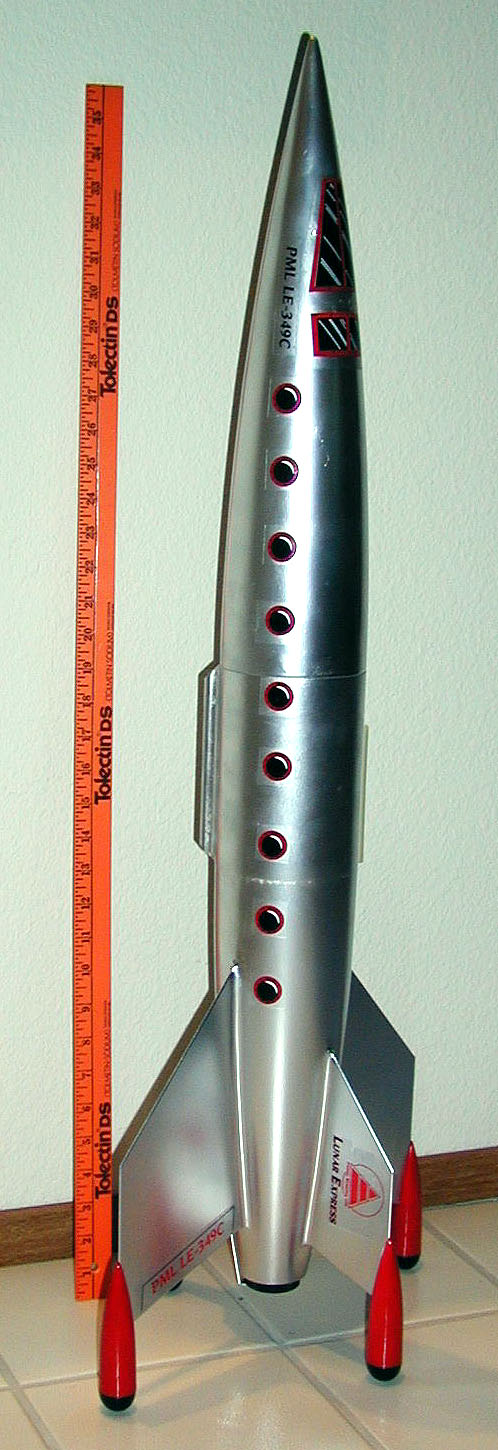
Picture #5
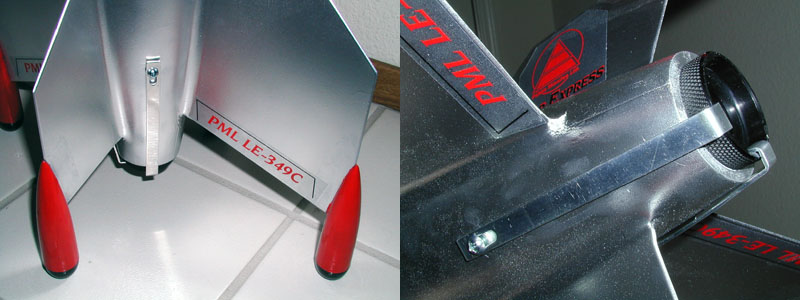
Picture #6
At the July LUNAR [www.lunar.org] launch I flew the Little Lunar Express on an H123-S. Launch weight was around 82 oz and the PML altitude chart said that it would need a 7.5 sec delay with this motor with an expected altitude of 1400 ft, since my rocket was heavier than the PML catalog weight I figured the 6 second delay would be about right. Picture #7 shows the liftoff, the flight was arrow straight even though there was a good breeze blowing. The ejection was about a second early (as expected) and parachute fully deployed. Due to the breeze the landing was a little harder than I would have liked. One of the wing pods came loose on landing and nose cone hit a sidewalk chipping off all the paint on the tip. Overall a great flight and some battle scars to give it character.
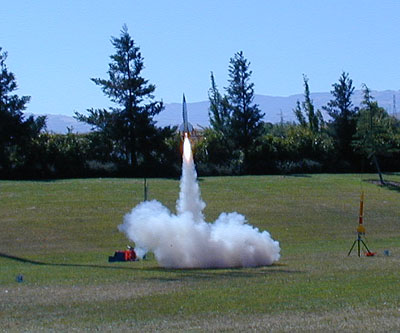
Picture #7
I really like this rocket and would recommend it to any one who has built a couple of high power rockets. The unique design makes it much more than a 4FNC, also the construction of this kit is a bit more challenging than the standard fare.
Return to IndexAll content is the responsibility of LUNAR.
If you have comments or suggestions regarding these web pages,
please contact the 
Copyright © 1992 - 2026 LUNAR