 LUNAR’clips
LUNAR’clips
Livermore Unit of the National Association of Rocketry January/February 2002
Copyright © 2002 by LUNAR, All rights reserved.
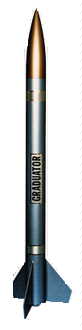
Travis Johnson started a very productive email discussion when he looked for advice in relation to a Graduator he had bought as a Christmas present for his father.
Kevin McGrath said: The Graduator is a perfect choice for your first step from low-power Estes type model rockets into MPR/HPR. The new Grads come with though-the-wall-to-the-MMT fin mounting, an improvement from the older models.
My advice is to build it stock, or nearly so.
People will tell you: you must use epoxy, or fiberglass etc. Or that you must replace the elastic shock cord with nylon or Kevlar. Forget all that. If you just want to get experience with using more exotic HPR materials and building techniques, fine; but they are not required on the Grad.
Just pay attention to getting good internal and external glue fillets on the fin tabs and a stock Grad will fly fine on H-motors. I have build the stock bird with yellow glue and flown it on H-motors for flights up to 3000'.
My only modification was to make a baffle, so I don't have to mess with wadding. I used a longer MMT and an extra centering ring to make a baffle as described on Bob Kaplows's website. The other advantage of the extra Centering Ring (CR) is that you don't have to install the aft CR when installing the MMT. The forward 2 CRs hold the MMT assembly in position in the airframe while the glue dries. Not installing the aft CR allows access to the fin tabs so you can make those nice internal fin fillets. Once the internal fillets are done then install the aft CR. I have many flights on the stock elastic shock cord with no scorching.
My Rocksim simulations for the Grad (and I have flown all of these):
 E15W-4    500'
 F20W-7    1600'
 G40W-10   2300'
 H180-10   3200'  (RMS 29/240)
Regarding my Rocksim sims putting a Grad on an F25 at 1600': Rocksim is generally optimistic on altitude predictions.
I checked my flight logs and the actual indicated altitude (using a G-wiz LC) was 1188' on an F25, well under the 1500' limit.
Wes Freeman adds: It sounds like Kevin and I built identical Graduators!
My kit didn't come with to-the-motor-mount fins, so I got some plywood at the hobby shop and cut new fins. The motor mount baffle really seems to help keep the chute clean, so it should last for a lot of flights.
One addition that I did make was adding blind nuts to the rear centering ring for motor retention. There should be info about that at Kaplow's web site (Kaplow klips). I've started using copper wire instead of brass clips to hold the motor in, and it's working very well.
So far mine has flown on E30 SU, E28 24mm RMS, and E23 and F40 29mm MS. If it wasn't for the 1500' limit, I would have been tempted to try a G64 at last Saturday's wonderfully calm launch.
Charles Winter said: Automotive type paint products can give results on your rocket as good as they get on a car ... Two caveats:
·
Most lacquer paint suppliers also have various additives to modify the paint, including getting it more flexible. The only areas I tend to see stress cracks in are near the fin joints / fillet areas. I love a great paint job - go for it! And please let me know what you learn. I've spent nearly a year now trying various paint / primer / rocket combinations. Just today I called quest to find out exactly what type of plastic is used on their rockets for paint compatibility - its different than Estes ...·
The solvents in many (the better) primers tend to attack plastics. Most of the LOC and PML nose cones seem to do ok, but the Estes and Quest ones show variance in this area. Obviously, try a sample first.Bill Orvis agreed, saying: Automotive paint works great, in fact, all the automotive products work great on rockets. I use body putty as filler, and Bondo glazing to fill the spiral tube groves and small cracks. Be sure to roughen the surface a little before painting and use primer to get good adhesion. When you paint on the primer, put a really thin coat first and let it dry before adding a thicker coat. If you start with a thick coat, it will crack at the high stress points.
Steve Kendall added that "dog barf" blow in cellulose insulation makes excellent wadding. It works great! If you find me, I have a bag of it and I'd be glad to give you what you need. I got mine from Lee, and he may have some more (he passed out bags at one of the club meetings over a year ago). If you *really* want to buy your own, it comes in great big bails at Home Depot. One bail should last you a lifetime, including giving it away from time to time.
Travis mentioned that 5-minute epoxy was being used for most of it and Micah Van Nuys added: if you still have to do fillets, might I suggest using Hobby Poxy formula 3 thixotropic epoxy, it is really thick and does not drip, perfect for rocket fillets, I use it every time.
And Geoff Stafford suggested: Or you could use the AeroPoxy PR2032 resin with it's accompanying hardener and mix in either Kevlar pulp and/or milled 'glass. I generally mix in both types of structural fillers. A little Kevlar pulp will thicken the epoxy nicely. A little bit goes a LONG way. Also, AeroPoxy makes a paste viscosity epoxy with the structural fillers already part of the mix. The stuff works great! Cures in about 20 to 30 minutes (depending on the temperature) and has a minimal run. That's the ES6279 stuff. I use it on my mid-power models and the other stuff on the high-power models. The strength of this epoxy is incredible, but it does require a cure temperature of at least 70 degrees F. As for just cosmetic filler, one that has worked wonders for me is the SuperFil from PolyFiber. Light, epoxy based filler that doesn't shrink and sands easily.
Bill Westfield got excited about a "glue" thread, and added: I experimented a bit with glues on my Aerotech kit. Used some of the "plastic welder" stuff, which worked really well on all those plastic to cardboard joints you find on an Aerotech kit; and some of the "epoxy gell" thixotropic (non-running) 5-minute epoxies for the second layer of fillets. Both were "consumer" epoxies (duro?) from a consumer store (Kmart?) – I don't think there's much need to hunt up expensive aerospace epoxies and exotic fillers for an aerotech "medium power" rocket. The instructions call for CA (superglue) only, I think. I've seen kits assembled per instructions at LUNAR, and they fly fine. They also have the interesting property of "dissassembling" cleanly in the case of prangs – one flight I witnessed failed to eject and landed on the sidewalk; the tube got crunched and the fins POPPED out WHOLE. A stronger assembly might have behaved differently, but I don't think it would have been any more easily repairable...
Anthony Cooper vouched for the Aerotech design, adding: The Piñata rocket is assembled with super glue. I did add a bead of 20 minute epoxy to the bulkhead and centering rings and filleted the fins with bondo.
Geoff Stafford commented: However, the AeroPoxy PR2032 can be purchased from Shadow Composites for about $28.00 per quart (after shipping and tax), which actually works out to be cheaper than an equivalent amount of hobby shop epoxy I can get for about $9 per 9 oz. kit (before tax). It's also been my experience that just about nothing will prevent heavy damage to your rocket if it falls sans recovery system on hard pavement. Also, another nice characteristic of this particular epoxy is that it soaks in to cardboard/phenolic/wood extremely well. About as good as CA does. That being said, remind me the next time I'm at LUNAR to show you the LOC Aura I beefed up. Using the aforementioned epoxy above, I laminated the body tube with two wraps of 1.8oz Kevlar cloth, laminated the fins with two plys of 1 oz non-woven carbon cloth each side and also used the pricey high-temp epoxy that Shadow Composites sells for the fillets of the fins. The first flight suffered a separation of the nose cone and body, with a burned 'chute and the second flight had the new parachute tangle and came down fast. However, the only damage to the rocket was some minor paint chipping. I know I over engineered the thing, but then again, I want to fly it on this H55 I have burning a hole in my range box.... :) I've also done pretty much the same thing to a Legacy that is currently in the process of being primed and painted. Eventually, I'll fly that one on an H180. I'd use the H210 I have, but they don't have any long delays for that motor just yet.
Personally, I just don't trust the CA's. I've had bad luck with them in the past, so I tend to avoid them. But that is my preference. I tend to build my birds to be rugged rather than light. Case in point, the above mentioned Aura. The only problem with Bondo is since it is a polyester based filler, it doesn't adhere all that well to epoxy based structures (fillets, tubes or otherwise).
Lee Teicheira: I pretty much have to agree with Geoff on all accounts. This last year I have been working with Tap Plastics marine epoxy. This stuff mixes at 4:1. A quart of resin costa about $18. Half pints of hardener are about $8. I have medium and fast which they say gives 10 and 25 minute pot life respectively at 72 deg F. I get that and more. And this is quality working time, not every last minute that the stuff is manageable. I also have jars of micro balloons and Cab-o-sil at about $5 each. without additives, this stuff will soak into paper tubes making it like phenolic. It laminates beautifully. Mixed with the micro balloons, it becomes a very light weight filler. Add Cab-o-sil and it thickens until it takes on a consistency like peanut butter. Now we are talking about an epoxy that has zero run or sag, and becomes harder and stronger, but tough to sand. That is until you also add micro balloons which then makes it very sandable. This is the finest fillet material I have ever used. I used to use Goldberg Epoxy Plus for fillets. Worked great. When Goldberg stopped making it, I went searching for a replacement. Couldn't find one so I bit the bullet, did some research and made my own. Wouldn't go back to the Goldberg stuff it I could. If you need structural strength, add milled or chopped glass or carbon fiber. The possibilities are endless.
The mix ratio of Tap epoxy is 4:1 and really pretty easy to work with. I weigh it out on a triple beam balance. What is generally accepted to be one of the best epoxy systems is West Systems. It mixes at 5:1. Hobby grade epoxies all mix at 1:1. Don't look now, but they are all based on the same chemistry. West Systems is a really pure resin and hardener. Tap hardener has a little filler in it to make packaging cheaper. Hobby grade hardener has *lots* of junk (filler) in it to make measuring easy. But at the same time all that filler wrecks the working properties. I would have never believed the difference if I hadn't tried it out for myself. Although West Systems epoxy is a bit purer, it's much harder to find, about 50% more expensive, and not that much better to work with when compared to Tap. But believe me, there's a *huge* difference between Tap and hobby grade epoxy. The initial purchase of Tap epoxy may seem high, but when compared to $10-12 for an 8 oz kit of hobby grade it's actually much cheaper. And when you compare the working qualities, good epoxy is cheep at twice the price. Mixed with the proper fillers, good epoxy can replace virtually all filling compounds and adhesives. I do still use 5 minute epoxy which is only available in 1:1 mix, CA, aliphatic, polyurethane, Goop and contact adhesives. They all have their place.
Bill Orvis: I like using bondo to fill the tube grooves, grooves around couplers, and to do some of the smaller, non-structural fillets. I put it on using a paint brush, which works better than trying to trawl it on directly from the tube. I start with a small cup about 3/4 inch deep (the bottom of a paper cup). I squeeze in some bondo filler and pour in about 1/2 inch of lacquer thinner. I can then paint on the bondo without having it dry out too fast. The lacquer thinner does not completely dissolve the bondo unless you really mix it hard. You can also smooth the bondo by dipping a finger in the lacquer thinner (probably not a good thing to do :-) ) and then smoothing the bondo with it. Bondo sticks to just about everything, smoothes nicely, and sands like butter. It has no structural strength, though, so it can only be used cosmetically.
Brett Buck: The lacquer thinner is probably not too bad, but the bondo can be pretty evil. The hardener (in the little bottle) contains methyl-ethyl-ketone *peroxide* (not regular MEK). This stuff is highly reactive - one drop in the eye and its instantly oxidized. It's not as bad in a mix, but I recommend rubber gloves at least. I'm no alarmist - I've smelled so much AeroGloss and SIG dope that the receptors are all dead and I can't really smell it anymore. Bondo and other polyesters also have some bad reactions to stuff like epoxy - the areas in contact with epoxy will not cure. In a thick mix like a typical Bondo application, it at least looks OK because it only screws up the interface. But a thin coat of polyester finishing resin will remain permanently gummy over any epoxy or even a fingerprint. Be sure to test it over every possible planned area before use. If you like Bondo, you'd really like Aeropoxy light. The only down side is the long cure time, but that's probably good at least as many times as it's bad. It's also dead light.
I use Fill'n'Finish/Carpenter's Finishing Wood Filler (the name has changed twice that I know of) for spiral filling. Thin it slightly with water, and use a hypodermic syringe type glue gun to apply. That way, it doesn't have to go all over the place. It's not too porous, and it sands very easily with 220 Fre-Cut followed by 320.
Finally, Peter Clay noted: You might want to go to http://www.rocketreviews.com This is a great site to get info and opinions on rockets, I believe that there are several reviews of the Graduator there.
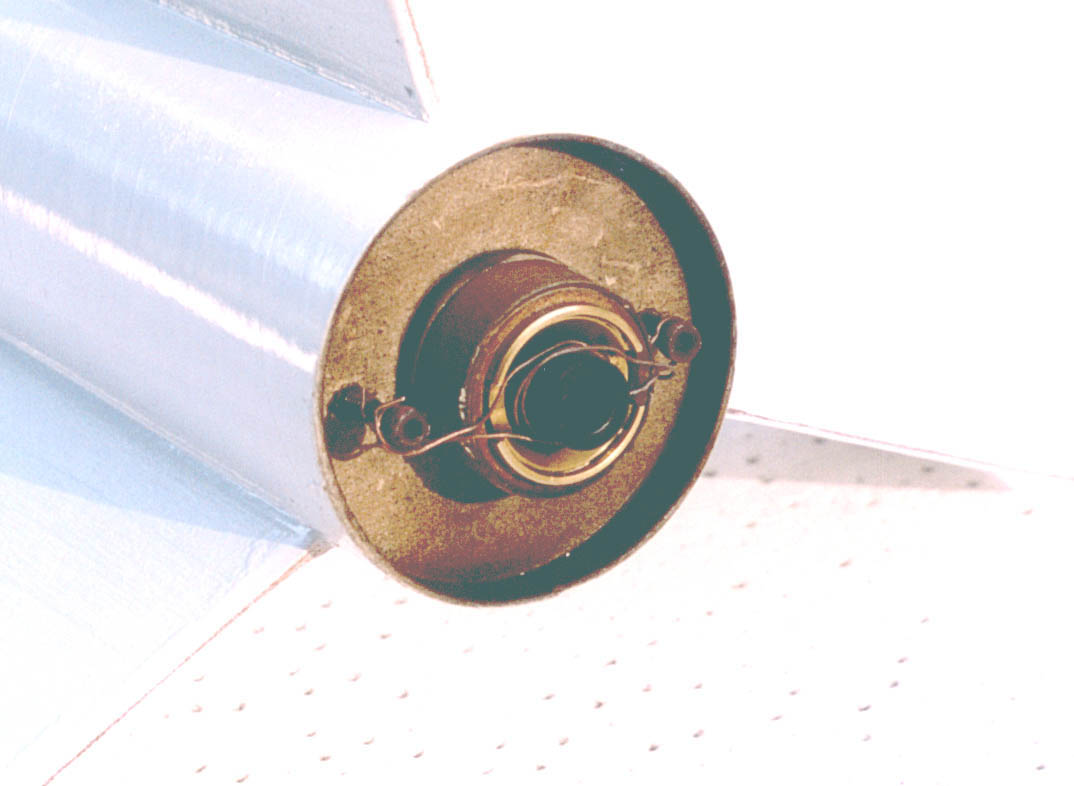
The business end of Wes Freeman’s Graduator, showing the bolts and copper wire that provide motor retention. The motor is a 24mm RMS casing in a LOC 29mm-to-24mm adapter with a tape thrust ring. The wire retention method makes it easy to use motors ranging from 29mm RMS (which is almost flush with the reat centering ring) to 24mm single-use (which sticks out quite a bit because it requires separate tape rings for the motor and adapter.
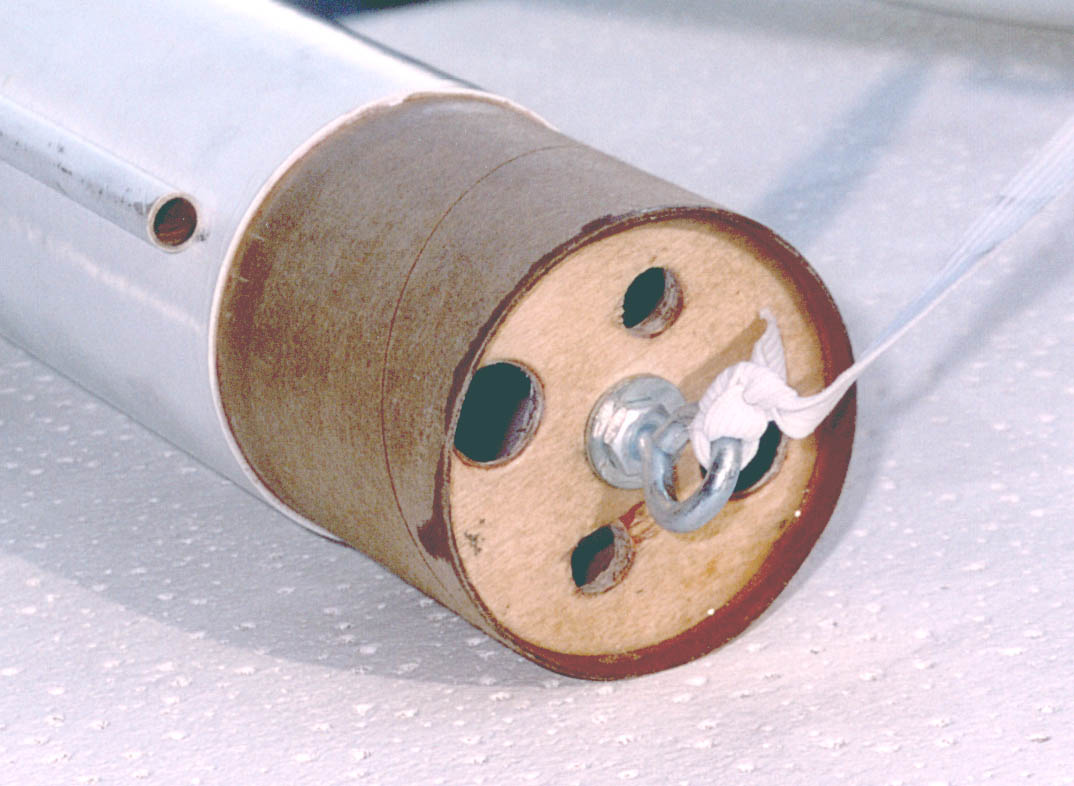
A baffle system for the Graduator. The body tube was cut 14.5" from the aft end and a coupler added. The MMT was extended to 10", plugged at the front, reinforced with fiberglass cloth for strength, and then drilled with numerous 1/4" holes to provide a path for the ejection gases. Not visible is a piece of 1/8" plywood, about 3/4" x 2", which was epoxied behind the bulkhead for added strength. Two 1/2" and two 3/8" holes provide a path for the ejection gases through the baffle. It's hard to see in the photo, but after about 6 flights the elastic shock cord is almost perfectly clean...a definite improvement over dog barf!
Return to Index
All content is the responsibility of LUNAR.
If you have comments or suggestions regarding these web pages,
please contact the 
Copyright © 1992 - 2026 LUNAR